Kraft Paper Bags
 Kraft Standup Pouches
 Kraft Bowls
 Kraft Food Boxes
 SOS Paper bag
 Bottles & Jars
 Eco Products
 Accessories
Your customer cannot touch, smell or turn your box in their hands. All they have is a photo. That is why the best packaging photography tips for e-commerce are really about trust: showing exact colors, crisp label text, real texture and honest proportions so a buyer feels confident enough to click “Add to Cart.” Whether you sell cakes, skincare, dry fruits or coffee, this guide walks you through the whole process in plain language, from planning your shots to exporting the final file.
You do not need a studio or an expensive camera. You need a repeatable system, and that is what you will get below.
📈 Why Packaging Photos Make or Break Your Sales
Shoppers scan before they read. In a few seconds they judge whether your product looks professional, safe and worth the price. Blurry, yellowish or glare-covered photos quietly say “this seller is careless,” even when the product inside is excellent.
Good product packaging photography does three jobs at once. It shows what the buyer will receive, it proves quality through detail, and it builds brand recognition across your whole catalog. Packaging is often the first thing a customer sees, so it deserves the same attention as the product. If you want to understand how much packaging itself influences buying decisions, our article on packaging as a marketing tool in Pakistan explains the psychology behind it.
There is also a practical reason. Clear images reduce returns and “is this the same as the picture?” messages. When your e-commerce product photography matches reality, buyers stay happy and reviews improve.
🗂️ Plan the Shoot Before You Pick Up the Camera
Most beginners start clicking and then wonder why their listing looks inconsistent. Professionals do the opposite. They plan first.
Begin by cleaning the packaging. Dust, fingerprints and tiny scratches look huge on camera. Use a microfiber cloth, a soft brush and a lint roller. If you are photographing printed boxes, check that the corners are sharp and the folds are straight, because a slightly crushed edge is very visible in a close-up.
Next, decide on a shot list. A strong listing usually tells a small story: here is the product, here is the detail, here is the size, here is how it looks in use. The table below gives a simple structure you can reuse for almost any packaged product.
| Image # | Shot Type | Purpose |
|---|---|---|
| 1 | Hero image (front, white background) | Main thumbnail, must be clean and sharp |
| 2 | Angled 45° view | Shows depth, shape and side printing |
| 3 | Label / close-up detail | Proves ingredients, logo and print quality |
| 4 | Size reference shot | Prevents size confusion and returns |
| 5 | Lifestyle or flat lay | Creates emotion and context |
| 6 | Unboxing or opened view | Shows what is inside and how it is protected |
If you are wondering how many photos an e-commerce listing should have, five to seven is a healthy range for most categories. Fewer than four feels thin, and more than eight can overwhelm unless each image adds new information.
📷 Choosing Your Gear: Smartphone or Camera?
You can absolutely learn how to photograph packaging with a smartphone and get professional results. Modern phones have excellent sensors. What separates amateur photos from professional ones is lighting, stability and editing, not the price of the device.
If you use a phone, clean the lens first (a surprisingly common fix for hazy photos), switch off the beauty filter, turn on the grid and use the main lens rather than a digital zoom. A cheap tripod and a Bluetooth shutter remove camera shake. Tripod and camera stability matter because even tiny movement softens small print on labels.
If you shoot with a DSLR or mirrorless camera, use a macro or a 50–100mm lens to avoid the stretched look of wide-angle lenses. The following settings are a reliable starting point for the best camera settings for packaging photography:
| Setting | Recommended Value | Why It Helps |
|---|---|---|
| Aperture | f/8 to f/11 | Keeps the whole box in sharp focus |
| ISO | 100 to 200 | Minimizes grain and noise |
| Shutter speed | 1/60s or slower (on tripod) | Allows clean exposure with soft light |
| White balance | Custom or manual | Protects accurate colors |
| File format | RAW (or highest-quality JPEG) | Gives room for editing |
Think of these as a base. Adjust one variable at a time, and take a test shot every time you change the setup.
💡 Lighting: The Most Important Part of Packaging Photography
If you only improve one thing, make it lighting. A well-lit average box beats a beautiful box in poor light every time, and a good packaging photography lighting setup can be built at home for very little money.
Soft Light Beats Harsh Light
Direct sunlight or a bare bulb creates hard shadows and bright hotspots. Instead, use softbox lighting or place a white sheet or diffusion panel between the light and the product. Two lights positioned at roughly 45 degrees on either side of the box give even, flattering illumination. A reflector (a white foam board works perfectly) bounces light into the shadow side and keeps the shape visible.
Natural window light also works well. Place your table next to a large window on an overcast day, then use a white board opposite the window to fill in the shadows. This is the heart of DIY packaging photography and costs almost nothing.
Using a Light Tent for Small Products
A light tent (or lightbox) surrounds your product with diffused light on all sides. It is ideal for small packaging such as jars, sachets, pouches and cosmetic cartons. It also makes tips for photographing small product packaging at home much easier, because you get consistent results without needing to understand advanced lighting.
How to Reduce Glare When Photographing Packaging
Glare is the number one complaint with glossy cartons, laminated pouches, metallic foil and plastic windows. The fix is mostly about angles. Light reflects off a surface at the same angle it hits it, so if a hotspot appears, move the light higher, lower or further to the side until the reflection disappears from the camera’s view.
Here are the quickest ways to control reflections:
- Place a large diffuser between the light and the product
- Use a polarizing filter on the lens (or polarizing film on the lights for tougher surfaces)
- Tilt the packaging slightly away from the light source
- Surround very shiny items with white cards to create soft, controlled reflections
For deeper control on reflective surface photography, many photographers shoot two frames, one lit to show the front detail and another lit to show the edges, then blend them during editing.
🤍 Backgrounds: Keep It Clean, Keep It Consistent
The best background for e-commerce product photos depends on where you sell, but white remains the safest choice. A clean white background keeps attention on the product, looks consistent in grid layouts and meets most marketplace rules.
For packaging photography on white background, use a sheet of white acrylic, a seamless paper roll or a white poster board curved smoothly upward. Light the background separately so it does not turn gray. A slightly soft shadow under the box makes it look grounded instead of floating, so do not remove shadows completely unless the platform demands it. Good shadow control is what makes a product look real.
Each platform has its own expectations, so check them before you shoot:
- Amazon packaging photography tips: the main image should have a pure white background and fill most of the frame. Amazon recommends at least 1000 pixels on the longest side to enable zoom.
- Shopify product photography tips: pick one aspect ratio (square is the easiest) and use it across your entire store so collections look tidy. Shopify’s recommended size is 2048 x 2048 pixels.
- Daraz and local marketplaces: clear, bright images with readable labels perform best. Our guide for Daraz sellers in Pakistan covers packaging choices that also photograph well.
📦 How to Photograph Different Packaging Types
Different shapes behave differently under light. Here is how to handle the most common ones.
Boxes and Cartons
Flat-sided boxes show every ripple and reflection. Shoot them at a slight angle so you can show the front and one side, and keep the camera at the same height as the box’s center to avoid distortion. For shipping and mailer packaging, use a clean shot of the closed box, then the open view. If you sell e-commerce boxes in multiple sizes, place a familiar object next to them for scale.
Bottles, Jars and Glass
Photographing boxes and bottles are two different skills. Glass and clear plastic reflect everything around them, including you and your camera. Use a large softbox on one side, a black card on the other to define the edges, and shoot slightly above the center line. For jars, such as a round plastic jar, keep the label facing straight to the lens and check that the lid has no fingerprints.
Pouches and Flexible Packaging
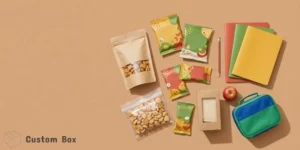
Pouches wrinkle easily and look sad when empty. Fill them with the real product or a neutral filler so they stand up properly, and gently smooth the surface. Matte kraft is forgiving, but metallic or laminated surfaces need diffused light to avoid hot spots. If you are showing off kraft stand-up pouches, a slightly elevated angle makes the pouch look full and premium. You can learn more about this format in our article on what a kraft stand-up pouch is and why businesses love it.
Tins, Acrylic and Premium Gift Packaging
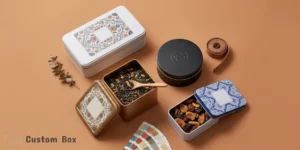
Metal tins and acrylic containers are among the toughest because they behave like mirrors. A light tent plus a polarizing filter solves most problems. For product families like tin boxes or acrylic boxes, shoot the closed container first, then the open one with the product visible inside.
Food and Bakery Packaging
Food packaging should look fresh and appetizing. Use warm but accurate light and keep a few crumbs, props or ingredients nearby to tell a story. Bakers can pair these tips with our guide on the best cake boxes for home bakers to make both the box and the cake look their best.
📐 Composition, Angles and Storytelling
Knowing the best angles for product packaging photography takes the guesswork out of every shoot. For most products, three angles cover everything: the straight front view (for your hero image), a 45-degree view (for depth), and a top-down view (for flat lays and size comparisons).
Your hero image is the single most important photo in the listing. It appears in search results, category pages and ads, so it should be sharp, centered, evenly lit and free from distractions. Leave a small margin of space around the product so marketplaces can crop it without cutting off edges.
Flat lay packaging photography is great for gift sets, cosmetic kits and subscription boxes. Arrange items on a clean surface from above, keep spacing consistent and align edges for a tidy, intentional look. This style works beautifully on social media and in secondary listing images.
Lifestyle product shots place your packaging in a believable setting, such as a coffee bag on a kitchen counter or a skincare box beside a bathroom sink. They help buyers imagine owning the item. Keep props minimal, because the packaging should still be the star.
Unboxing photography shows the opening experience: tissue paper, inserts, stickers and the first reveal. This type of photo is especially strong for gifting and premium brands. If you want to design the moment itself, read our guide on how to create a memorable unboxing experience.
Finally, consider packaging mockup photography when you are still designing. A mockup lets you test how a design looks on camera before printing in bulk, which saves money and avoids surprises.
🔍 Show Packaging Details Customers Actually Care About
Buyers zoom in. They want to read the ingredients, check the barcode, see the finish and judge print quality. Make product label clarity a priority by shooting at least one close-up where all the text is legible without squinting.
Use a macro setting or move the camera closer rather than cropping a small photo later. Keep the label flat and parallel to the sensor so the text does not curve or blur at the edges. For finishes like embossing, spot UV or foil stamping, use side lighting so the texture throws tiny shadows, which makes the detail visible.
Color deserves the same attention. Color accuracy is one of the biggest causes of disappointed customers, especially with brand colors, so shoot with a neutral gray card, set your white balance manually and calibrate your monitor if possible. If your brand uses a signature shade, keep it consistent across all photos. That is brand consistency, and it is what makes a catalog look like it belongs to one trustworthy business. For help building that identity, see our guide on building a packaging brand in Pakistan.
🖼️ Editing, Sizing and Exporting for the Web
Editing is not about changing the product. It is about making the photo look like what the eye sees in person. A simple workflow includes cropping and straightening, adjusting exposure and contrast, correcting the white balance and removing dust or scratches. This is the core of photo editing and retouching for e-commerce.
For background removal, tools like Photoshop, Canva or free online editors can isolate the product, but keep a soft natural shadow so the box does not look like a sticker. After editing, always compare the photo to the real packaging. If the colors differ, adjust again.
Then comes the technical side. Image resolution and file size must balance quality and speed, because large files slow down your page and hurt both rankings and conversions. Use image compression for web with tools like TinyPNG or Squoosh, and aim for files under 200 KB where possible without visible quality loss. WebP usually gives smaller files than JPEG.
As for what size e-commerce product images should be, a practical standard is 1000 to 2000 pixels on the longest side with a square or 4:5 ratio. Follow your platform’s product image dimensions and keep every image in a collection the same size. Finally, rename files with descriptive names (for example, kraft-stand-up-pouch-white-background.webp) and add alt text, which helps both accessibility and search visibility.
If you want to go further, a 360-degree product view lets customers rotate your packaging on screen and can boost confidence for higher-value items.
⚠️ Common Mistakes to Avoid
Even experienced sellers repeat these errors, so check your photos against this list before uploading:
- Shooting under mixed lighting (yellow room light plus daylight)
- Leaving dust, fingerprints or wrinkles on the packaging
- Using over-saturated filters that change real colors
- Cropping too tightly so the box edges are cut off
- Uploading huge, uncompressed images that slow your store
- Using inconsistent backgrounds, angles or sizes across products
✅ Quick Pre-Upload Checklist
Before you publish a listing, confirm that the packaging is clean, the hero image has a pure white or consistent background, the label text is readable, the colors match the real product and every file is compressed and properly named. Then view the listing on your phone, because most shoppers will see it there first.
If your packaging itself needs an upgrade before the shoot, browsing custom e-commerce packaging boxes or reading our complete e-commerce packaging guide for Pakistan is a good place to start. Better packaging photographs better, and that makes every other step easier.
❓ Frequently Asked Questions
How do I take good photos of product packaging?
Use soft, even light, a clean background, a tripod and a sharp focus on the label. Clean the packaging first, shoot from a few angles and do light editing to correct color and brightness.
What lighting is best for product packaging photos?
Soft, diffused light such as softboxes, a light tent or a window with a white curtain works best. It reduces harsh shadows and glare while keeping colors accurate.
How do I photograph shiny or glossy packaging?
Diffuse your light, change the angle of the light so reflections fall away from the lens, and use a polarizing filter. White cards around the product help create smooth, controlled reflections.
Can I photograph packaging with a smartphone?
Yes. Clean the lens, use natural or softbox light, mount the phone on a tripod, turn on the grid and edit lightly. Lighting and stability matter more than the phone model.
What size should e-commerce product images be?
Aim for 1000 to 2000 pixels on the longest side, usually in a square or 4:5 ratio, and compress files to keep them fast. Always check the platform’s specific requirements.
How many photos should an e-commerce listing have?
Five to seven images is ideal: a hero shot, an angled view, a label close-up, a size reference, a lifestyle or flat lay shot and an unboxing or opened view.
🎯 Conclusion
Great packaging photos are not about luck or expensive equipment. They come from a simple, repeatable process: plan your shots, light the product softly, keep backgrounds clean, show real details and edit honestly. Follow these packaging photography tips for e-commerce consistently, and your listings will look more professional, build more trust and convert more visitors into buyers.
📞 Ready to Make Your Packaging Look as Good as Your Product?
Photography starts with packaging worth photographing. Explore our range of custom printed boxes, pouches, tins and e-commerce packaging at Custom Box Pakistan, and get packaging that looks stunning on the shelf and on the screen. Contact us today to get started.