Kraft Paper Bags
 Kraft Standup Pouches
 Kraft Bowls
 Kraft Food Boxes
 SOS Paper bag
 Bottles & Jars
 Eco Products
 Accessories
If you’ve ever wondered why a coffee pouch keeps its aroma sealed for months while a cheap plastic bag lets everything go stale in days, the answer lies in one word: lamination. How lamination works in standup pouches is essentially a science of stacking different films together so each layer contributes a specific strength — one blocks moisture, another blocks light, and another gives the pouch its rigidity and print clarity. For businesses in Pakistan packaging everything from spices to skincare, understanding this process isn’t just technical trivia — it’s the difference between a product that survives shipping and shelf life, and one that doesn’t.
In this guide, we’ll walk through exactly how the lamination process works inside a standup pouch, the techniques manufacturers use, the film types involved, and how you can pick the right laminated pouch for your own brand. Think of it as pulling back the curtain on what’s really happening behind that glossy, food-safe exterior.
🧬 What Is Lamination in Standup Pouches?
Lamination, in the context of flexible packaging, is the process of bonding two or more layers of film together to create a single, unified material with combined properties. A standup pouch rarely relies on just one type of plastic or paper — instead, it’s built from a multi-layer film structure, where each layer is chosen for a specific job. One layer might handle the printing and visual appeal, another might act as a moisture barrier, and the innermost layer is almost always responsible for heat sealing.
This is why a well-laminated standup pouch feels sturdier and performs better than a single-ply plastic bag. The lamination process essentially engineers a “sandwich” of materials, and the bonding technique used determines how strong, flexible, and protective that sandwich turns out to be. Without lamination, packaging would either be too weak to protect the product or too rigid to form the pouch shape at all.
⚙️ Why Lamination Matters for Flexible Packaging
Here’s where things get practical. Flexible packaging manufacturers don’t laminate pouches just to make them look glossy — they do it to solve real physical problems that a single film simply can’t handle on its own.
Moisture, oxygen, and light are the three biggest enemies of packaged goods, whether it’s roasted coffee beans, dry fruits, or pharmaceutical powders. A single-layer film might resist one of these threats but fail against the others. Lamination allows manufacturers to combine films with different resistances — for instance, pairing a PET film lamination layer (great for strength and printability) with an aluminum foil lamination layer (excellent for blocking light and oxygen). The result is a pouch that performs on multiple fronts simultaneously.
This is especially relevant for products with long shelf-life requirements. If you’ve ever compared a kraft aluminum lamination pouch against a plain kraft pouch, you’ll notice the aluminum-backed version keeps contents fresher for significantly longer — that’s lamination doing its job of creating an oxygen and moisture barrier that a single kraft layer simply cannot provide on its own.
🔬 Standup Pouch Lamination Process — Step by Step
Now let’s get into the actual mechanics of how pouches get laminated. While exact machinery varies between manufacturers, the fundamental process follows a consistent sequence.
Step 1: Substrate Selection and Preparation
Everything starts with choosing the right base films. Manufacturers select combinations based on what the pouch needs to do — for a coffee pouch, that usually means combining a printable outer layer (often BOPP or PET) with a barrier middle layer (aluminum foil or metalized film) and a heat-sealable inner layer (typically polyethylene). Each roll of film is unwound and prepared for bonding, checked for tension consistency and surface cleanliness, since even minor contamination can cause weak bonding later.
Step 2: Adhesive Application or Bonding Method
Depending on the lamination technique chosen (more on this below), an adhesive is applied evenly across one film’s surface, or the films are bonded using heat and pressure without adhesive at all. This stage determines a lot about the final pouch’s flexibility and barrier strength — too little adhesive and layers separate under stress; too much and the pouch becomes stiff or develops adhesive bleed-through, which affects print clarity.
Step 3: Nip Roller Pressing
The films are then passed through a nip roller — essentially two rollers pressed together with calibrated force — which physically presses the layers into intimate contact. This is the moment the “sandwich” actually forms. Pressure and speed here need to be precisely controlled; too fast and bonding is incomplete, too slow and production efficiency drops.
Step 4: Curing Process
After bonding, the laminated film needs to cure — a period where the adhesive fully sets and the bond strength reaches its maximum potential. In solvent-based systems, this involves drying ovens; in solventless systems, it’s a controlled aging period in warm storage rooms. Skipping or rushing curing is one of the most common causes of pouch delamination complaints, where layers peel apart after the product has already been packed.
Step 5: Slitting and Pouch Conversion
Once cured, the large laminated film rolls are slit into working widths and sent to pouch-making machines, where they’re folded, side-sealed, bottom-sealed, and shaped into the final standup pouch format — ready for zippers, spouts, or valves depending on the design.
🧪 Types of Lamination Techniques Used for Pouches
Not all lamination is created equal, and the technique used significantly affects both cost and performance. Here’s how the main methods compare:
Dry Lamination
Dry lamination involves applying a solvent-based adhesive to one film, passing it through a drying tunnel to evaporate the solvent, and then bonding it to the second film under heat and pressure. It produces strong, reliable bonds and is widely used for high-barrier pouches, though it requires more energy and generates solvent emissions that need proper handling.
Wet Lamination
In wet lamination, the adhesive is applied and the films are bonded together while the adhesive is still wet, then dried afterward as a combined unit. This method is generally used for porous substrates like paper, and it’s faster for certain applications, though it offers less bond strength compared to dry lamination for non-porous films.
Extrusion Lamination
Here, a molten layer of plastic (usually polyethylene) is extruded directly between two films, acting as both the adhesive and a functional barrier layer simultaneously. Extrusion lamination is cost-effective and commonly used when a thicker sealing layer is also desired, though it demands precise temperature control to avoid material degradation.
Solventless Lamination
Considered the more environmentally responsible option, solventless lamination uses a 100%-solids adhesive applied in a thin, precise layer with no solvent evaporation step needed. It’s increasingly popular for food packaging because it eliminates residual solvent concerns entirely — a factor that matters a lot for products like spices, snacks, and pharmaceuticals where taste and safety are non-negotiable.
The choice between these techniques ultimately comes down to what the pouch needs to achieve — barrier performance, cost efficiency, or environmental compliance — and reputable manufacturers often mix approaches depending on the product category.
📊 Multi-Layer Film Structure in Standup Pouches
To understand why lamination matters so much, it helps to see how a typical laminated pouch structure breaks down layer by layer:
| Layer Position | Common Material | Primary Function |
|---|---|---|
| Outer Layer | PET / BOPP Film | Printability, gloss, tensile strength |
| Middle Layer | Aluminum Foil / Metalized Film | Oxygen & moisture barrier, light blocking |
| Inner Layer | Polyethylene (PE) / Polypropylene (PP) | Heat sealing, product contact safety |
This three-layer approach is the industry standard for most food-grade standup pouches, though some products — like retort-ready meals — require additional layers for heat resistance during sterilization. If you’re packaging something that needs to survive boiling or steam processing, it’s worth exploring 3-sided seal retort pouches, which use a reinforced lamination structure built specifically for that stress.
🌐 Practical Examples: How Lamination Protects Real Products
Let’s ground this in real-world scenarios, because theory only goes so far without context.
Take roasted coffee beans as an example. Coffee releases carbon dioxide after roasting while being extremely sensitive to oxygen exposure, which causes staling. A laminated pouch with an aluminum foil middle layer and a one-way degassing valve solves both problems at once — the lamination blocks oxygen from getting in, while the valve lets built-up gas escape. This is precisely why premium coffee brands almost universally rely on aluminum-laminated structures rather than plain kraft paper alone.
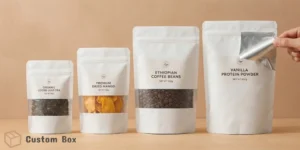
Now consider dry fruits and nuts, which are highly sensitive to moisture and rancidity from oxygen exposure. A white kraft aluminum laminated standup pouch combines the visual appeal of kraft paper with the protective backbone of aluminum lamination, giving businesses shelf-ready packaging that looks premium while genuinely extending product life.
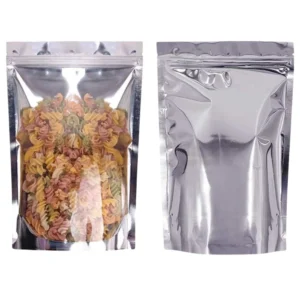
Or think about spice powders, which lose potency quickly when exposed to humidity. Here, an aluminium foil standup pouch with a fully laminated barrier structure keeps flavor compounds locked in far longer than unlaminated alternatives — something any spice exporter in Pakistan trying to meet international shelf-life expectations needs to take seriously.
✅ Benefits of Properly Laminated Standup Pouches
Beyond the technical process, it’s worth summarizing why getting lamination right pays off commercially:
- Extended shelf life through effective moisture and oxygen barriers
- Better print quality and branding since outer layers are optimized purely for graphics
- Improved seal integrity, reducing leaks and product spoilage during transit
- Greater durability against punctures, tears, and rough handling in logistics
- Regulatory compliance for food-safe and pharmaceutical-grade packaging standards
These benefits compound over time — a brand that consistently delivers fresh, intact products builds trust faster than one dealing with frequent complaints about spoiled or damaged goods.
🎯 How to Choose the Right Laminated Pouch for Your Business
Selecting the correct laminated pouch isn’t just about picking whatever looks nicest on a shelf. It starts with understanding your product’s specific vulnerabilities — is it moisture-sensitive, light-sensitive, oxygen-sensitive, or all three? From there, film thickness matters too, which is where checking a GSM guide for packaging can help you understand how material weight translates into durability and barrier performance.
Budget also plays a role, since solventless lamination and multi-barrier structures cost more than simpler dry-laminated kraft options. For businesses just starting out, reviewing a custom kraft pouches buying guide can clarify which lamination level fits your product category and price point without overspending on barrier protection you don’t actually need.
Finally, consider sizing and format early in the process. A pouch that’s technically well-laminated but poorly sized for your product will still create packaging inefficiencies — it’s worth checking a kraft pouch sizes guide before finalizing your order, so the lamination investment pairs with a format that actually fits your fulfillment workflow.
❓ Frequently Asked Questions
Q1: What does lamination actually mean in standup pouch manufacturing? Lamination means bonding two or more films together into one combined material, giving the pouch multiple protective and functional properties instead of relying on a single layer.
Q2: Which lamination method offers the best barrier protection? Dry lamination combined with an aluminum foil middle layer generally offers the strongest barrier protection against oxygen, moisture, and light, making it the go-to choice for premium food packaging.
Q3: Is solventless lamination better for food safety? Yes, solventless lamination eliminates residual solvent risks, making it a safer and more environmentally responsible choice for food-contact packaging compared to traditional solvent-based methods.
Q4: How can I tell if a pouch is properly laminated? A well-laminated pouch feels sturdy, resists puncturing, has no visible bubbling or layer separation, and maintains seal integrity even under gentle pressure or twisting.
Q5: Does lamination affect the printing quality of a pouch? Yes, lamination actually improves print quality by protecting the printed layer underneath a clear or glossy outer film, preventing scuffing, fading, and moisture damage to the design.
🚀 Final Thoughts
Understanding how lamination works in standup pouches ultimately comes down to appreciating that packaging is engineering, not just aesthetics. Every laminated layer — from the printable outer film to the barrier core to the heat-sealable inner surface — plays a defined role in keeping your product fresh, protected, and shelf-ready. Whether you’re packaging coffee, spices, dry fruits, or skincare products, choosing the right lamination structure directly impacts customer satisfaction and repeat business.
If you’re ready to move from research to real packaging, explore CustomBox’s full range of laminated kraft standup pouches and get a structure built specifically around what your product needs to survive — from shelf to doorstep.